
Find a local plumber
- Inspiration /
- Indoor projects /
- Bathroom & laundry /
- How to fix a leaking...
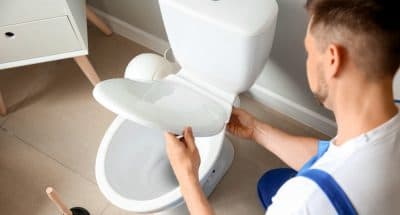
How to fix a leaking toilet cistern
A leaky toilet cistern can cause serious damage to your toilet and bathroom. Don't wait until it's too late, learn how to replace or repair a toilet cistern today!
What is a toilet cistern?
A toilet cistern, also known as the tank, is one of the most essential components of toilets and is where water is stored before it’s used to flush the toilet. It’s located above the toilet bowl and may also be higher above the toilet, connected by a single pipe. The cistern has a flushing mechanism in proximity to it to control the water.
Types of toilet cisterns in Australia
1. Concealed Cisterns: These cisterns are installed within the wall cavity, making them completely hidden from view. They are commonly used in modern bathrooms to create a sleek and minimalist look.
2. Close Coupled Cisterns: This is the most common type of cistern used in Australia. The cistern is mounted directly on top of the toilet bowl and connected with a flush pipe.
3. High-Level Cisterns: These cisterns are mounted high on the wall above the toilet bowl and connected with a flush pipe. They are a classic and elegant option often used in heritage homes or to create a vintage look.
4. Low-Level Cisterns: Similar to high-level cisterns, low-level cisterns are mounted on the wall, but much closer to the toilet bowl. They are a good option for those who want a traditional look without the height of a high-level cistern.
5. In-Wall Cisterns: These cisterns are installed within the wall cavity but have an access panel for maintenance. They are similar to concealed cisterns but are easier to access if repairs or maintenance are needed.
6. Dual Flush Cisterns: These cisterns have two buttons or levers that allow you to choose between a full flush or a half flush, depending on the amount of water needed to clear the bowl. They are a popular option for those looking to reduce their water usage.
7. Caroma Uniset Cisterns: This cistern is a specific type of close-coupled cistern that features a unique design and built-in inlet and outlet valves. It is a popular choice in Australia due to its ease of installation and water efficiency.
8. Fowler Ware Toilet Cisterns. These cisterns are known for their durability and reliability. They typically have a traditional design and are made of ceramic. These cisterns operate using a flushing mechanism that releases water from the cistern into the toilet bowl to remove waste.
What does a cistern do?
A cistern operates using a valve that controls the water flow with the help of a plastic float. The float is responsible for regulating the water level inside the tank by opening or closing the valve depending on how much water is present. The valve fully opens each time the toilet is flushed to allow more water to enter the cistern and refill it to the required level.
How to replace a toilet cistern?
Suppose the toilet cistern becomes damaged or develops flush tank water leakage. In that case, you’ll need to replace it by completing a few steps. You can complete the project yourself because it’s a simple and common plumbing repair. Start by turning off the shutoff valve clockwise and completely drain out all of the water from the tank. You can use a sponge to absorb any remaining moisture.
Use an adjustable wrench to hold the nut under the tank bolt and unscrew the bolts with a screwdriver. After completely removing the tank, lay it down. In some cases, the washer may not move and come loose. Try using an adjustable wrench to turn it. You can now insert the new spud washer before removing the bolts and gaskets.
You’ll then need to clean around the holes of the tank with a sturdy wire brush to remove any of the old bold gasket, which may still be present on the inside and outside of the tank. The new gasket will only seal properly if the surface is clean. The new gaskets will need to be firmly seated onto the bolts. Reinstall each nut on the bottom of the cistern and tighten them by hand until they feel secure.
The last step of the DIY leaking toilet repair process is tightening the nuts and bolts and alternating to each side until it looks like the gaskets are seated. It’s also important to avoid tightening the bolts too much, which can cause minor cracks to form on the toilet cistern.
How to repair a toilet cistern?
There are a few common ways to fix a leaking toilet cistern to restore its operation and prevent the problem from escalating.
1. Repairing the flush valve – Located in the middle of tanks, the flush valve is one of the main components of the leaking toilet cistern and operates with a float ball. Bend the float arm down to shut off the water. Adjust the water level and also consider replacing the ballcock valve with an updated float-cup style fill valve to avoid potential problems in the future.
2. Fixing a loose flush handle – The lift chain should be reconnected to the lift arm from the flapper. You can also adjust the handle mounting nut located inside of the cistern by rotating it counterclockwise.

Toilet cistern washer replacements
Cistern washer – Inlet
You can replace a leaking toilet cistern inlet valve by turning off the water supply to the toilet and flushing the toilet. Remove the blue top and remove the arm from the float cup adjusting rod. Remove the cap by turning the arm counterclockwise before removing the inlet valve head seal.
Cistern washer – Outlet
When you need to perform a toilet cistern washer replacement for the outlet, start by shutting the water off through the mains isolation or the stop tap. Thoroughly drain the tank and remove the old seating washer. The seat should be in good condition before you install the new cistern waster outlet. The seat should be smooth to prevent the new washer from leaking. Install the new piece and verify that the clips are in position.
How to fix leaking cistern valves?
Cistern inlet valve – Remove the lid and flush the system and turn off the water valve before draining all of the water out by flushing the toilet. Remove the broken parts and attach the new pieces onto the cistern inlet valve. As the tank fills with water, check the water level while tightening connections and looking for leaks.
Cistern outlet valve – Turn off the water supply and remove the lid on the toilet cistern. Flush the toilet to remove all of the water and use a sponge to absorb any remaining moisture.
How to fix a cistern flush?
You can fix a cistern flush to avoid wasting any more water when the inlet valve doesn’t shut off once the water reaches the desired level. Start by checking for leaks in the tank with the use of vegetable dye. Lower the float arm to ensure the ball starts to sit lower to ensure the inlet valve shuts off sooner.
Adjust the float levels by adjusting the screw on the float arm and ball to ensure the inlet valve shuts off. Keep a close eye on the water level markings to ensure the water hits the appropriate level. Gently remove the damaged parts and install the new pieces. Check to see everything fits securely. Place the lid back onto the cistern and connect the water valve. Flush the toilet again and check to see if the toilet is still leaking.
When should I call an expert?
It’s important to know when to contact a professional to ensure your toilet continues to operate correctly after you spot toilet leaking. Calling a plumbing expert will allow you to get the toilet back in working order and consult the help of someone with more training and experience.
Contact local plumbing experts
The Problem Persists
You’ll need leaking cistern repair if the problem isn’t resolved with your attempts. You may follow each step and still have questions. You may also have caused more extensive damage during your dripping toilet attempt.
The Parts Aren’t Damaged
After inspecting the parts on your leaking toilet tank, you may not spot any areas where the problem is located. Calling a professional will allow you to hire someone who can diagnose the problem and remedy it if it’s an underlying issue that’s not related to the parts.
You Have Questions
You may have further questions about the mechanisms and operation of your toilet cistern to address, which is when a professional can help. You may want to know how to stop a toilet cistern from overflowing or how to prevent damage or wear to the parts.
If the above steps have not fixed your problem or if you lack confidence in your DIY abilities, it may be time to call a licensed plumber.
How much will your job cost?
The Oneflare Cost Guide Centre is your one-stop shop to help you set your budget; from smaller tasks to larger projects.
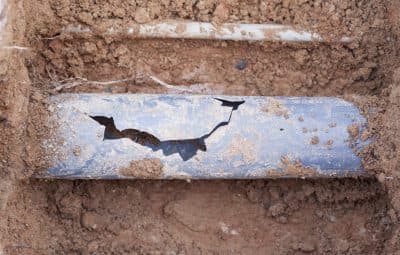
Sewer Pipe Relining costs
Average price $500 - $4,000
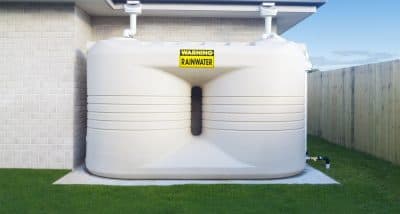
Water Tank costs
Average price $70 - $130 per hour

Shower costs
Average price $1,500 - $6,500

Bathtub costs
Average price $500 - $5,000
Toilet costs
Average price $60 - $130 per hour
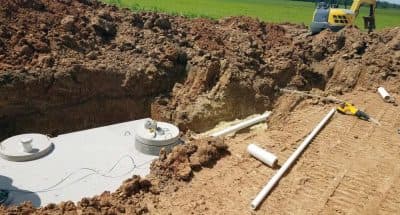
Septic Tank costs
Average price $7,000 - $15,000

Solar Hot Water System costs
Average price $2,500 - $8,000

Plumber costs
Average price $50 - $250 per hour