Find a local painter
- Inspiration /
- Indoor projects /
- Walls & flooring /
- A guide to fixing...
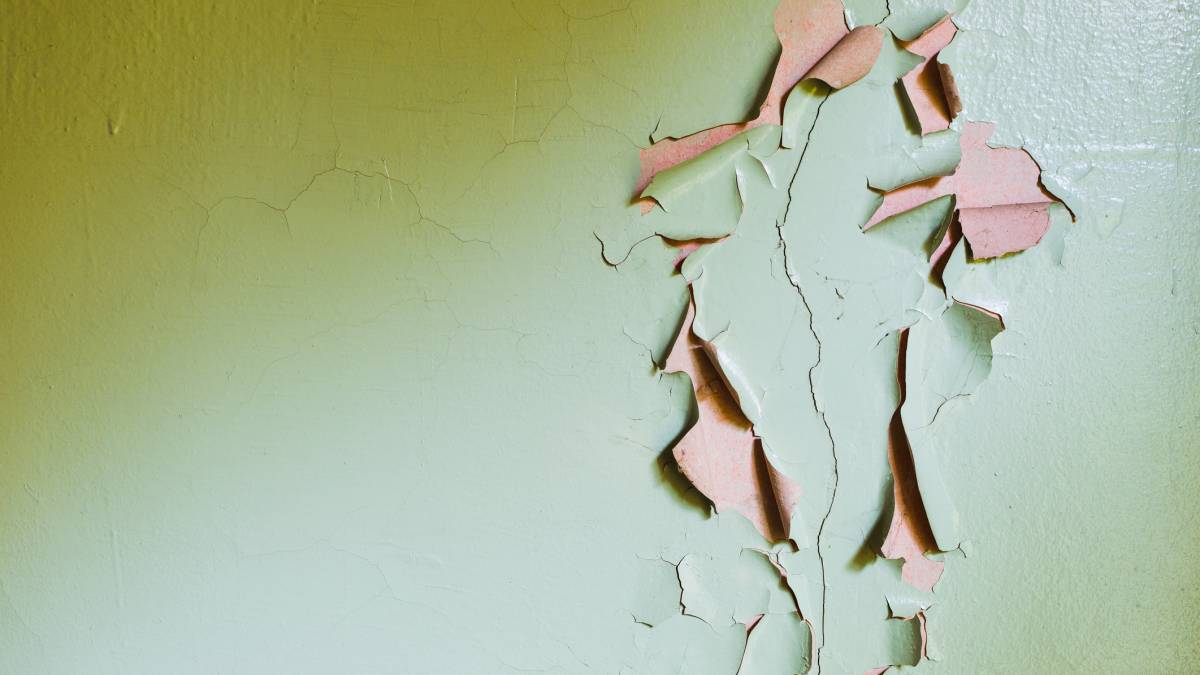
A guide to fixing peeling paint on walls
Find out how to fix peeling paint on walls (and how to avoid it!)
Seeing paint peeling on walls can be frustrating, and dealing with it requires much effort. Peeling paint is one of the most common interior painting problems, and the good news is you can minimise the headache with a proactive approach.
Luckily, this guide offers you what you need to sort out your peeling paint issue. With a bit of know-how and some simple steps, you can learn how to prevent paint from peeling from walls.
Common causes of peeling paint
Paint peeling off can be a pesky problem, and understanding its common causes is crucial to preventing it from happening again.
Excess moisture
When water finds its way beneath the paint layers, it disrupts the bond between the surface and the paint. This often occurs in areas prone to high humidity, leaks, or poor ventilation.
Poor surface preparation
If surfaces aren’t properly cleaned, sanded, and primed before painting, the lack of a solid base to adhere to can cause premature peeling.
Low-quality paint
Using low-quality or inappropriate paint for specific surfaces can result in peeling. Investing in high-quality paint suitable for the surface type is a surefire way to prevent wall paint from peeling.
Temperature fluctuations
High temperatures, such as intense sunlight, can impact the curing process, preventing the paint from sticking to the surface, which leads to peeling.
What you’ll need
Fixing peeling paint can seem challenging, but don’t worry. Regardless of whether you do it yourself or have an expert do it for you, being armed with the right tools, supplies, and knowledge on how to use them.
Peeling paint, whether a minor inconvenience or a glaring eyesore, requires attention to detail and a methodical approach. Arm yourself with these tools and supplies to fix peeled paint on walls and achieve a smooth finish.
Safety gear
Put on your safety glasses and a dust mask. It’s imperative to do so during scraping and sanding to prevent inhalation of dust and debris.
High-quality paint
Pick top-quality acrylic paint that suits the specific needs of the room or exterior. Ensure it’s compatible with the primer and the surface material to promote adhesion and longevity.
Paint scraper
Use a sturdy paint scraper to remove peeling or loose paint from your interior walls. Opt for one with a comfortable grip to make the scraping process more manageable.
Sandpaper
Fine-grit sandpaper helps smooth out the edges where paint has peeled and prepares the surface for a new coat. Different grits may be needed for various surfaces and degrees of peeling.
Primer
A good primer is an effective bonding agent, creating a robust connection between the wall surface and the new paint. This provides a smooth canvas for your paint to adhere to and significantly reduces the chances of peeling in the future.
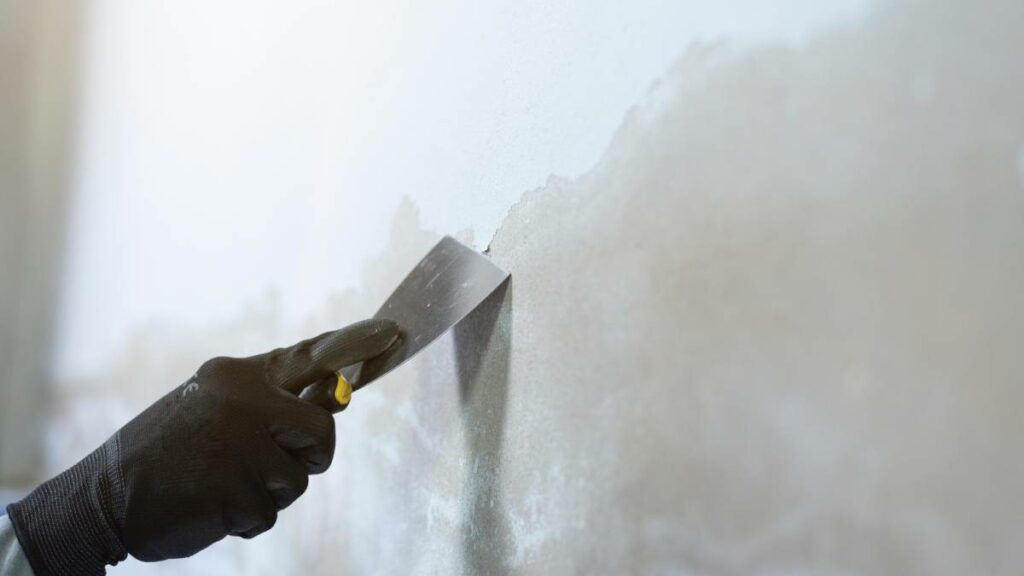
Putty knife
For filling in any gaps, cracks, or holes left by the peeling paint, a putty knife or spackle can help cover peeling paint on walls and help you achieve a smooth and even surface.
Paintbrush or paint roller
Ready your painting tools to repaint the area that needs fixing. You can use a paintbrush for smaller areas or a paint roller to cover wider spaces.
8 Steps to fix peeling paint on walls
Step 1: Prepare the area and ready your tools

Before setting out to fix peeling paint in your home, gather all the tools and supplies needed for the job. It’s best also to wear your protective gear before you get into it.
It’s also advisable to thoroughly examine the affected area beforehand. Identify the extent of the peeling and check for any issues, like water damage or structural problems.
Step 2: Cover nearby furniture in the area
When painting a wall, using painter’s tape is a great way to keep adjacent walls, furniture, and surfaces from being painted. You can also cover floors and furniture with drop cloths or plastic sheeting for better protection against paint splatters and accidents.
Step 3: Get rid of the loose paint
With the help of your scraper, putty knife, or wire brush, carefully remove peeling paint from your walls. Remove the loose paint evenly so it’ll leave a smooth surface free of remaining paint chips.
Remember not to apply too much pressure on your walls; otherwise, you might end up with dents and marks that can interfere with the painting process later.
Step 4: Repair and smoothen the surface
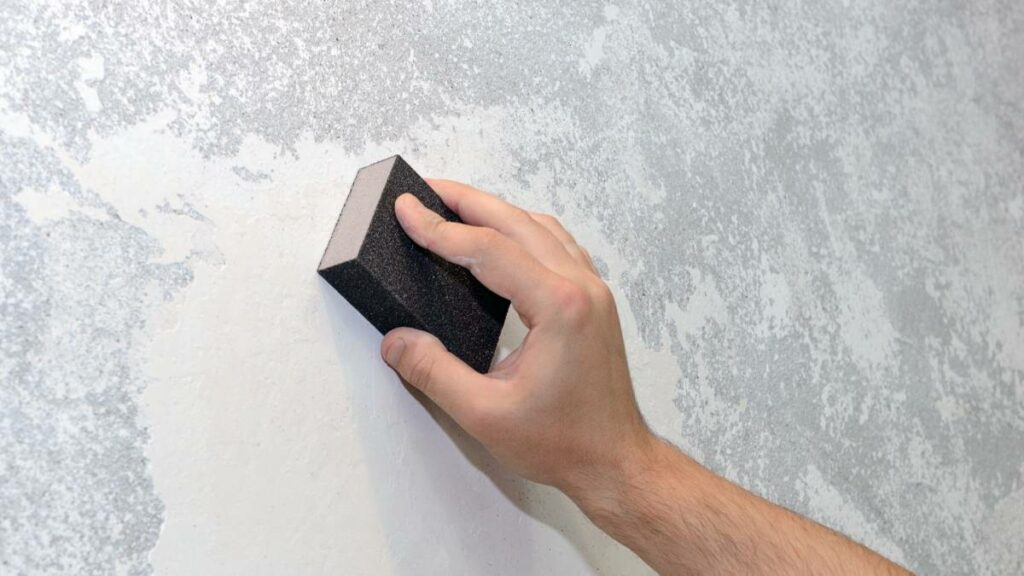
Using sandpaper, smooth out the edges and prepare the surface for new paint. This step helps create a uniform and level surface, encouraging better paint adhesion when applying fresh paint to the wall.
Step 5: Fill in the gaps and holes
Render your wall or fill in any gaps, cracks, or holes left by the peeling paint with the help of your tools, such as your putty knife or spackle.
This is especially important if you’re dealing with fixing holes left after scraping paint off, and this step helps smoothen the different surfaces involved before applying paint. Ensure the fillers are completely dry to seal the surface even and get it ready for the next phase of the process.
Step 6: Apply your primer
Once the surface is dry, apply a high-quality primer to the concerned area or the entire wall if you’re repainting the whole area. This helps create a strong bond between the wall and the new paint and prevents future peeling. Let the primer dry completely before applying your colour.
Step 7: Start painting
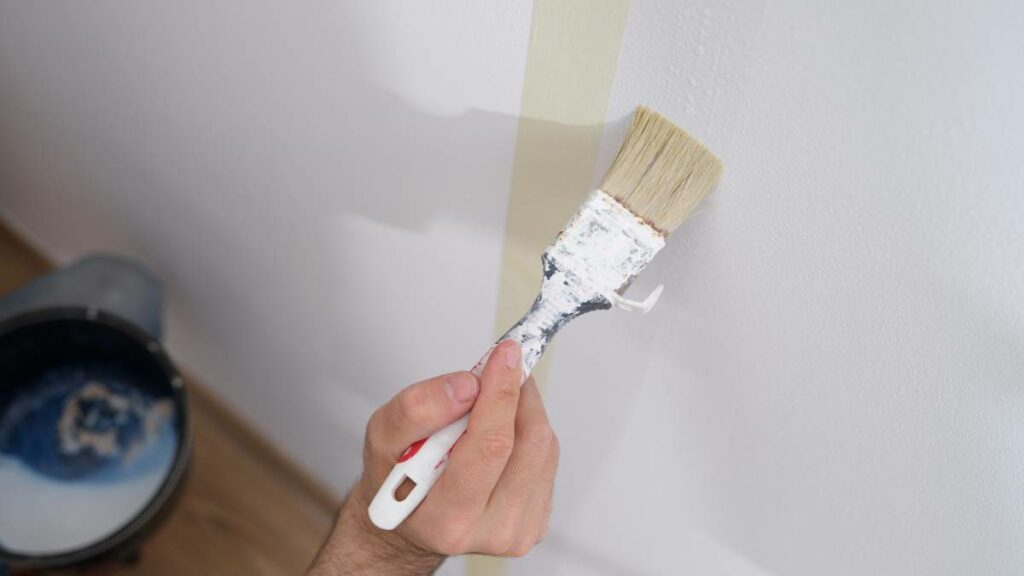
Once the primer has dried, it’s time to start painting! Ready your painting tools, like paint brushes or paint roller, and use your quality paint of the same finish and colour (and paint brand, if possible) and start painting. If necessary, apply multiple coats of paint and let the wet areas dry before reapplying.
If you can’t find your old paint tin or are stumped on which colour to buy, carve a small paint sample from your wall and bring it to a hardware store to check for a colour match.
From unsightly to appealing
Although you can’t stop paint from peeling due to wear and tear, you can certainly slow down the process and extend the life of your paint job when equipped with the proper knowledge and tools.
If doubts arise about your DIY prowess, hiring professional painters is a viable option. Their expertise ensures skilled paint application and the investment pays off in the form of a well-executed paint job and polished walls for years.
FAQs on peeling paint on walls
What causes new paint to peel off walls?
Many factors can cause the new paint to peel off walls, such as poor surface preparation, excess moisture, low-quality paint, lack of primer, and too many coats painted on too quickly.
How do you keep paint from peeling when removing tape?
Preventing paint from peeling when removing tape requires a careful and strategic approach. Wait for the paint to dry before you peel off the tape. It’s also recommended to use high-quality painter’s tape to adhere well to the newly painted wall without causing damage upon removal.
Can I paint over peeling wall paint?
Yes, but you should follow the right steps for lasting and polished results. Remember to remove loose or peeling paint, sand and clean the surface, use high-quality primers and paints, and follow the proper painting techniques to give your walls that fresh makeover.
How much will your job cost?
The Oneflare Cost Guide Centre is your one-stop shop to help you set your budget; from smaller tasks to larger projects.